MikroTik
Prepare certificates
To establish a valid RadSec connection, the MikroTik Access Points must trust the RADIUS Server Certificate and your RADIUS server must trust the RadSec Client Certificate. To achieve this, follow below steps:
Option 1: Using the SCEPman PKI
Download the root certificate of the CA that has issued your active RADIUS Server Certificate as described here. Since you are using SCEPman, that might be your SCEPman Root CA certfiicate.
Log on to your MikroTik device, then upload the certificate from step 1 above to the MikroTik device using the Files menu on the left.
Once uploaded, switch to your Terminal tab on the top right and execute the following command to import this certificate to MikroTik's certificate store:
/certificate import file-name="scepman-root.cer"Generate a RadSec Client Certificate using SCEPman Certificate Master by navigating to the Client Certificate menu:

Ensure to monitor the expiry of your RadSec Client Certificate and renew it in due time to prevent service interruptions.
Once the RadSec Client Certificate is downloaded, extract the private key, e.g. using OpenSSL, as this will have to be imported to the access point separately:
Upload both files, the certificate and the private key via the Files menu. Then import the certificate first and then the private key. During the import process the private key will merge with the certificate indicated by a letter 'K' as shown below.

Option 2: Using other PKIs
Use this section if you want to create a root CA on your Mikrotik AP and generate a RadSec Client Certificate from this root. Please note that all of these steps can be completed either in GUI or terminal.
Download the root certificate of the CA that has issued your active RADIUS Server Certificate as described here.
Log on to your MikroTik device, then upload the certificate from step 1 above to the MikroTik device using the Files menu on the left.
Once uploaded, switch to your Terminal tab on the top right and execute the following command to import this certificate to MikroTik's certificate store:
If you have not already generated RadSec Client Certificate for MikroTik AP, generate one as per the below example. For more information about creating certificates, click here.
Ensure to monitor the expiry of your RadSec Client Certificate and renew it in due time to prevent service interruptions.
Example:
In the above example, the first line creates a root CA called myCa. The second line generates a client certificate for the MikroTik device, and the third line uses myCa (CA) to sign the mikrotik-client certificate generated in step 2. If all went well, you would end up with three certificates as shown below. Please ensure your MikroTik device trusts the relevant certificates (T flag in the green section). If that is not the case yet, set the flag using below command:

Export the root CA certificate (
myCa) that has issued your RadSec Client Certificate above:
MikroTik Configuration
Please note that the below configuration was tested with RouterOS 6.47.4 and 6.49.11
Switch back to your WebFig, add a new RADIUS profile and enter the following information:
Address
Use the IP address from your Server Settings page.
Protocol
radsec
Secret
"radsec"
Authentication Port
2083
Accounting Port
2083
Timeout
4000 ms

Go to Wireless, add a new Security Profile and enter the following information:

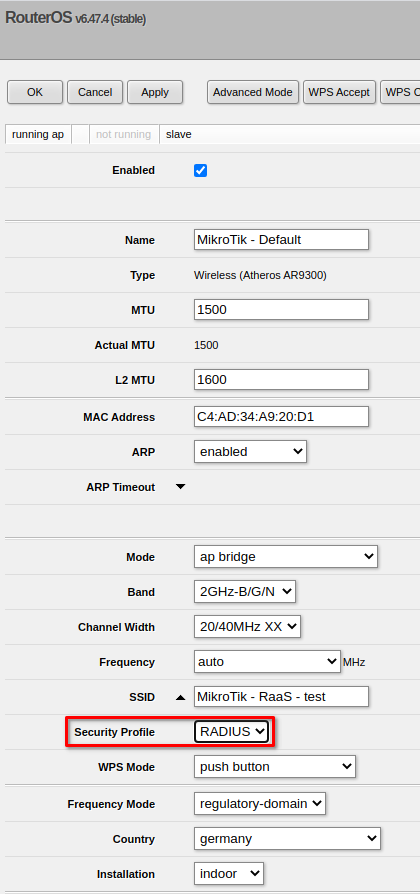
Switch to your Wi-Fi Interfaces and assign your Security Profile to the interface.

Last updated
Was this helpful?